


To assemble Valor, you'll need some superglue. We recommend Zap-a-Gap, because it not only holds nicely, it lives up to its name and fills those small gaps between pieces. You'll also need a file, to knockoff any rough spots.
There are six pieces to Valor. All the pieces are obvious, but their orientation may not be.
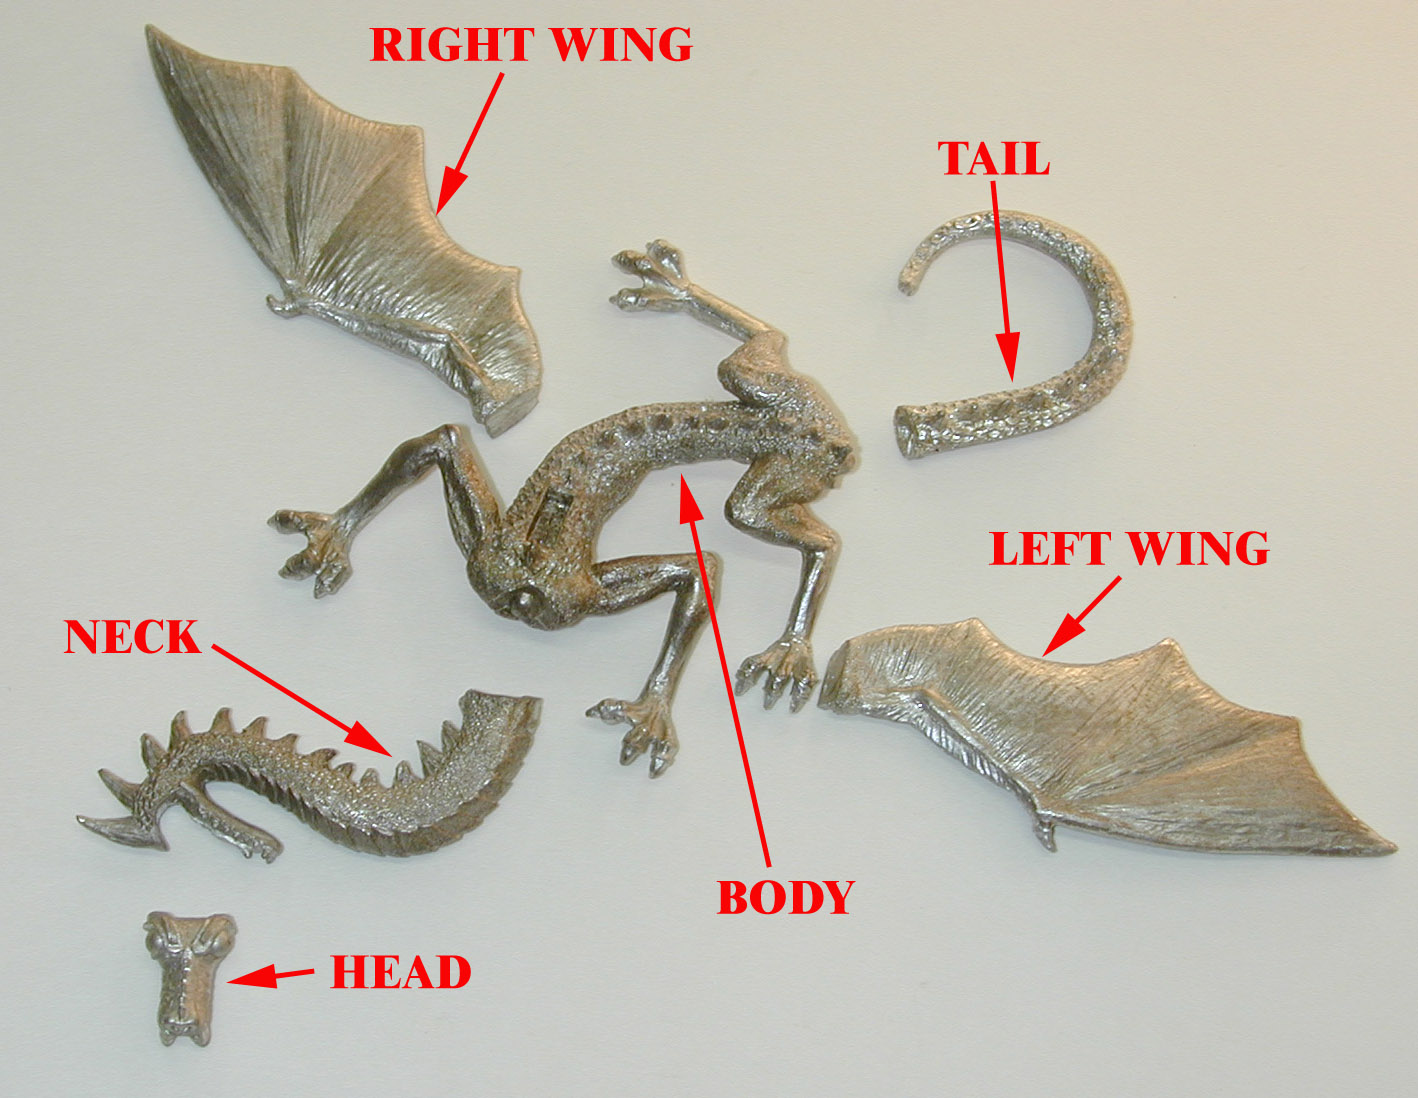
The leading edge of the wings are thicker than the back, and have a single talon in the center. The top of the tail has a row of spikes running the length, following the row of spines on Valor's back.


Before painting, we recommend fitting all pieces together, and filing any rough areas.
We recommend attaching the tail to the body, the wings to each other, and the head to the neck before painting. Once all three assembled pieces are painted and dried, then final assembly is recommended.
Attaching the wings is a two stage process. First, make sure the flat edges are smooth. Glue the flat edges together. Grasp the wings near the base to apply pressure. A padded clip, as shown below, can be used to hold the pieces together if your glue does not quickly set. A hemostat or pair of pliers (with a heavy rubber band holding the jaws closed) will also work.

At the top of the neck is the lower jaw and forehead ridge of Valor. The forehead ridge slides over the back of the head, and between the eyes. This will be a tight fit.
We recommend attaching the head to the neck before attaching the neck to the body.
Attaching the neck and tail to the body is essentially the same procedure: make sure the round nub on the body fits into the socket on the appendage, then glue with light pressure. Follow the instructions of your adhesive of choice, but we often find that applying a small amount of glue to each part, then letting the glue get tacky before actual contact, shortens the required duration of pressure.
To assemble Valor, you'll need some superglue. We recommend Zap-a-Gap, because it not only holds nicely, it lives up to its name and fills those small gaps between pieces. You'll also need a file, to knockoff any rough spots.
Cerberus has two parts: the body and the third head.

Before painting, we recommend fitting the pieces together, and filing any rough areas.
We recommend attaching the third head to the body, and letting the glue thourhougly dry, before painting. Because the joint area is large, don't be afraid to use a little extra glue.

Cerberus has a sprue connecting the base with the right paw. This sprue was included to help the piece cast better, and can be removed. Alternatively, this sprue can be painted as a branch of a bush or a rock, and incorporated into the base.
